Thursday 30 July 2015

Soldiers of God Test Game Part Two

My solo game of "Soldiers of God" continued last night. (Part One here). I documented every move, took lots of photos etc. I left it open in the Blogger app on the iPad. This morning it was all gone - MUST HIT SAVE !!!!

So in this post I will do a little write up on my thoughts on the rules.

I found that noting down every detail (as in part one) was a brilliant way to learn the rules. As I was sharing my game on the blog I felt the need to be precise so I checked each action. I think I got just about everything right. Playing Solo isn't the same as having a real opponent but it does let you take your time.

The Book


Handy A5 format. Lots of nice pictures and an Index. I couldn't find some things in the Index so not 100%, but it had most things. There is a very brief historical section, the main rules, scenarios, mini campaign, army lists and siege rules. The QRS and army roster are printed at the back just before the Index. I made up my own QRS and rosters on the computer for use during the game.

The rules are clearly laid out with lots of examples. There is a sample game in which several moves are worked through.

The author has a couple of page spreads on his blog.

The Cards

There is a 52 card deck. Each card has an Action and a special event. The cards drive the game.

The Rules

I like card activation systems (I a'int been shot Mum style) but have not enjoyed all of the games with card mechanisms that I have played. This one worked for me. The cards add a good feeling of friction and provide challenging decision making. They don't take over. I have tried games where managing the deck takes over from moving the toys around; this game wasn't like that.

The special events are fun and relevant; providing surprises even in a Solo game.

The movement rules are straight forward, as are shooting and combat with no major surprises.

I really like the Army Morale system. You start with a number derived from the units in your army. This number goes down as your army gets into contact and starts taking losses. Some events can make the number go up (a baggage camp is a good idea as it can potentially increase the Army Morale Value each turn - but don't lose it!). The reason that I like this is that it gives an indication of the health of your army and when it hits zero the game is over, no quibbling, just over and you have lost. Some rules that I play have nothing to indicate the game is over - last man standing; I don't like those. I also get frustrated with rules where a division has a break point (half of its units, broken for example) and the army breaks when a certain number of divisions break. I often feel that one more move would have turned the game around in those systems; especially when up to half of the army may not even be committed. This whole army morale mechanism feels better to me. More chance of one battle fighting a last stand whilst the other flank sweeps to victory.

The siege rules look workable. I am told sieges can be boring; these don't look boring. This could be because they concentrate on the final assault. I have no city walls or castles in my collection; maybe I will get some soon.

The scenarios are Large battle, small battle, raid and siege assault. The battles are typical line em up and fight. Raid puts one small army in the centre strip of the width of the table and the other around the short edges. I am going to try this for my first game with an opponent.

The campaign is a simple ladder system. Starts with raids, culminates in large battles and siege assaults.

Army Lists

Two army lists in the book - Saracens and Crusaders. There are force limitation for the different scenarios. For example you can't take elite "Al-Halqa" units on a raid. Lots of unit choice and nice extras like holy relics and Naffatun.

Other Thought

I like the period specificity of the rules, more flavour than using generic rules like DBx or Hail Caesar.

The battle plan system is brilliant. I will be stealing it. You take three cards that define a battle plan, one for each "battle" in the army. These cards drive a default action for each "battle". So you have to make a plan and stick to it. For pre-napoleonic warfare I think that this reflects reality. Once a plan was made the commander effectively lost control and could only influence local situations. The extra cards cover the extraordinary situations (the unit commander that turns a flank and wins the day sort of stuff). But, you are stuck with the plan you select at the beginning of the game.

I think the system is expandable. A couple of ideas come to mind.

A brilliant commander could change a battle plan card once during the game, or have a one time use spare card.

It could be used for Napoleonics and after where new battle plan cards could be couriered to a Corps/Division. Rules for interpretation could take the Corps commander's personality into account and delay the change of order or even lead to it being ignored.

The rules could be used pretty much unchanged (apart from wording on some of the cards) for any medieval battle. With some suitable treachery cards maybe for Wars of the Roses (I have lots of figures, still looking for a good set of rules).

Overall

Great set of period specific rules. I really enjoyed my solo game. I have lots of figures for this era and I want a set of goto rules. Hopefully my human opponents will like them and they can become my default set.

Postscript

I did finish the game. The Crusaders destroyed the Saracen right wing in turn 5. But the Saracens killed one of the Crusader commanders on the same turn. In the final reckoning the Saracens were on an army morale of two, the crusaders hit zero. Very close run.

As a further postscript, I have played Crusades using four or five rulesets now over around 8 or 9 games. All of the games have been close but the Saracens have always won.


Tuesday 28 July 2015

Soldiers of God Test Game Part One

A week ago I bought a copy of "Soldiers of God" by Warwick Kinrade. This is my first solo game with the rules.

I selected two 150 point armies. The Crusaders had:

One 3 stand unit of holy order Knights
Two 2 stand units of Knights
Two 3 stand units of crossbows (2 units is not strictly legal but I don't have crusader archers yet)
Two 4 stand units of men at arms (foot)
One 2 stand unit of Turcopoles
3 Commanders

The rules put these into 3 "battles"

The Saracens had:

Four 3 stand units of horse archers
Two 3 stand units of Ghulums
Two 4 stand units of Adath (militia  spears)
Two 4 stand units of archers
One 2 stand unit of Arab Tribal Cavalry
Two mounted commanders and one on foot
Again in three "battles"

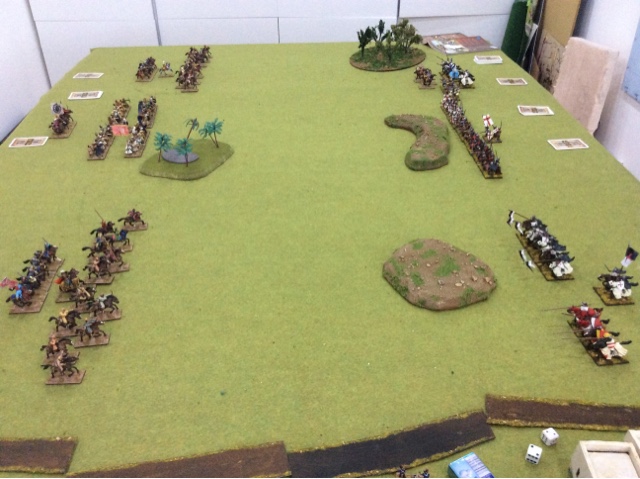
This was the deployment:


Note the cards, these drive the game.

Three cards are allocated to each side to denote their battle plan. These are allocated one per battle and they stay with that battle for the game.

As I was playing solo I selected the battle plans at random.

 The Crusaders battle plan was "Double Envelopment". This gave each flank a "Charge" card. The centre received a "March" card.

The Saracen battle plan was "Hold and Harry". The flanks each had a "Advance, Loose!, Retire" card, the centre had a "Loose!" card.

As the Saracen plan was less aggressive they had to deploy first.

After deployment each side was dealt four more cards. 

As the more aggressive side the Crusaders went first.

They drew the following cards:

War Engine Loose! - useless as no war engines on the table. But each card has a special event. this card has "Inspired Leader" which removes disorder from units.
Manoeuvre- allows more complex movement, special event - Inspired leader ( again)
Skirmishes Move - special event; Local Knowledges - allows a Saracen unit to move through bad terrain more easily ( no good for the Crusaders)
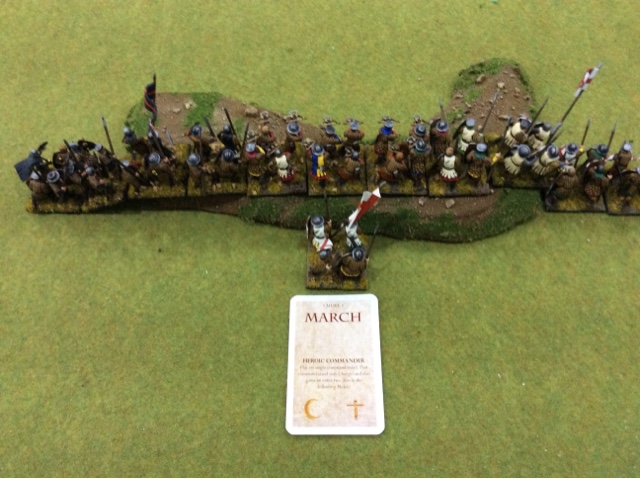
March - the basic movement card. special event - well drilled, used to remove disorder from better quality troops.

Note the special events on the "battle" cards are not available during the game.

The Crusaders chose to use their centre battle's set card, "March" to move all of the units forward. As medium infantry they move 4 inches (paces in the rules, you decide how long as pace is, for 28's one inch is suggested).


Now the Saracens use a card. They drew:

March - special event "local knowledge"
Loose! - the shooting card, special event "death to the infidel" which allows a unit of Saracens to re-roll melee dice.
Rally - special event "tribal disloyalty" allowing the crusader to disorder some Arab units
Loose! - special event "war engine breaks"

The Saracens played the March card on the centre battle. They advanced 4 inches, moving one stand width obliquely. 


Back to the Crusaders. They used the other March card to move the centre battle again.


The Saracens didn't really have a useful card, the Advance, Loose!, Retire cards on each flank were no use, 6" move and 9" bow range didn't look likely to reach the enemy ( no pre-measuring allowed). So the Saracens traded two cards for one replacement in lieu of a turn. A Loose! and a Rally were traded for a Charge card. This had the special event of "Mercenary Grievance" inconveniences an enemy mercenary unit (horse archers, crossbows and Turcopoles ).

Back to the Infadels. The left battle used its default Charge card to make a full move towards the enemy. This is 5" for heavy cavalry in close order. They could have galloped (allowed once per game) fo 8" but this would cause a point of disorder.


Saracens. The right hand battle use the charge card that was just drawn. 6" for the close order Ghulums, 12 for the open order skirmishes.


Crusaders. Play a Charge card on the right battle.


Saracens. The left battle play their default Advance, Loose!, Retire card with both units of horse archers.

The first unit advances 6" but finds itself out of borage an retreats. The second unit moves up 6" and shoots at the Crusader Turcopoles. As a three stand unit they roll 3D6 needing 3+ to hit, there are no modifiers. 


two hits, causes two resolve test on the Turcopoles. The Turcopoles have a resolve of 5+. They fail one testroll and take a point of disorder.


Disorder is bad. If at the end of a turn the unit has more disorder than stands it will break. The figures are removed and army morale takes a hit. Army morale will also go down if disorder equals the number of stands.

The Saracen horse archers retreat and the Crusaders take a turn. They use the skirmishes move card to pull the Turcopoles back.

Saracens. No useful cards. This is a problem. The only option is to pass and discard. They give in a Loose! Card. This action would allow them to remove disorder on a unit, but no units have disorder.
The Saracens have a single Loose! Card left.

The crusaders play a Manoevre card to advance the centre battle half a move. The card would allow formation changes or a change to open order if they wanted. 

This brings the crusader men at arms into range of some Saracen horse archers who use their final card, Loose!. Three dice are rolled, one hit. The crusaders have 5+ resolve, they fail and receive a point of disorder.


That finishes the Saracens for this "turn". The crusaders have a War Engines Loose! Card.they use the Inspired leader special event to take the disorder off of the men at arms.

At turn end the action cards are returned to the bottom of the deck. The cards allocated to the battles are retained at the edge of the table. No units have been routed and none have disorder equal to their stands. This means that Army Morale is not affected. Army morale is derived from the forces chosen. For this game the Crusaders have Army Morale of 18, the Saracens have 13.

Turn two.

Crusader cards: March (Allah is great - no use to Christians), Fear - causes an enemy unit to take a resolve test - (Tribal disloyalty), Fear (Deserters - causes resolve test on low quality enemy unit), Loose! (War engine direct hit - enhances war engine shooting).

Saracen cards: Melee - fight (Mercenray grievance resolved), March (Levy panic - put D6 disorder on poor quality enemy unit - ouch), War engine loose! (War engine direct hit) - useless in this game. Melee ( Bold Champion - issue a challenge in Melee with advantage to your champion).

Initiative goes to the side with the highest army morale. So the Crusaders go first. The centre battle plays it's default March card to oblique the crossbows towards the Saracen horse archers. This does not put them in a position to shoot. They can only shoot out to 45degrees, they will need a Manoevre card to get to the right angle.

The Saracens play their right battle' s ALR ( it is too long to type) card. One unit of horse archers moves into range of some Knights and shoot. Three hits ! The Knights resolve is 4+. They fail one test and take one point of disorder.


The horse archers withdraw. The second horse archer unit moves up to shoot at the Templars. One hit.  The Templars easily pass their 3+ resolve with a 5.

The crusaders play their right battle's Charge card and advance.

The Saracens play a March card on the centre battle.

The Muslim infantry could be in range. The crusader plays a Loose! Card on the centre battle and measures the range. Just under 10", just in range. Three dice are rolled ... 2, 5, 6, two hits. With a resolve if 6+ (militia) the Saracen infantry take two points of disorder.


The Saracens trade a War Engine Loose and a Melee card for a Challenge card, this lets champions fight in a Melee, probably not useful this turn.

The crusaders twist the knife playing their deserters special event on the milita, this breaks the unit's morale and they flee. This means that the armies morale could take a loss. A dice is rolled by the Saracens, a 4. This reduces their army morale by two, to 11.

The Saracens use the left battle's ALR card. But they can't get in range of the crusaders.

The Crusaders play March on their left battle. 

The Saracens trade Challenge and Melee for a Manoevre card. 

The Crusaders play Charge on the Left battle. The Knights don't reach (with a point of disorder they couldn't risk galloping). The Templars hit the horse archers and fight a Melee. The Templars get Shock Impact and immediately cause a point of disorder on the horse archers.

The Knights get three dice, their lances hit on 2+ (only one chance per game with lances). Two hits, with resolve of 5+ the horse archers take a point of disorder. 


They hit on 5+ with their swords but they lose a dice for being in open order and another for light horse fighting heavies. They miss.

The Saracens now play Manoevre in the Centre. 


They have a Loose! card left; this has to be used on the centre battle.

The crusaders play Fear on the disordered horse archers and they receive another point of disorder. 

The final Saracen Loose! Card allows a unit of archers to shoot at the crossbows. Four dice hitting on 4+ gives 3 hits. With a resolve of 5+ the crossbows receive three points of disorder. This equals their number of stands and as we are at the end of the turn army morale drops by one point to 17.

The Horse Archers have disorder equaling their number of stands, the Saracens take one off of their Morale Value; drops to 10.

So at the end of turn two the score is Crusaders 17, Saracens 10.

More in part two.


28mm "Saracen" Cavalry Comparison

I have taken a couple of photos to compare some of the "Saracen" cavalry that I have.]


From Left to Right: GB Plastic, GB Plastic, Perry, Perry, GB Metal, GB Metal


From Left to Right: GB Metal, GB Metal, GB Plastic, GB Plastic, Perry, Perry

From Left to Right: GB Plastic, GB Plastic, Perry, Perry

As you can see they mix well.


Greek Light Cavalry

Some Greek Light Cavalry; from the Victrix set of the same name. I did add in a few heads from the spares box.